
Oven Glass Cleaner | Complete Guide to Sparkling Clean Doors
Why Clean Oven Glass Matters More Than You Think
Have you ever opened your oven and squinted through a cloudy, grease-streaked glass door, wondering what’s actually cooking inside? You’re not alone. That dirty oven glass isn’t just an eyesore—it’s a window into your cooking habits, and honestly, it might be silently judging you every time you preheat.
But here’s the thing: cleaning oven glass doesn’t have to be the nightmare you’ve been putting off for months. Whether you’re dealing with light splatters or years of carbonized buildup that looks like abstract art, the right oven glass cleaner and technique can restore that door to showroom condition. In this comprehensive guide, we’ll dive deep into everything you need to know about oven glass cleaners—from understanding what creates those stubborn stains to mastering both commercial and DIY solutions that actually deliver results.
Understanding the Science Behind Oven Glass Grime
What Causes Stubborn Oven Door Stains?
Ever wondered why oven glass gets so much dirtier than regular windows? The answer lies in what happens during the cooking process. When you roast, bake, or broil, tiny particles of fat, oil, and food splatter onto the hot glass surface. At temperatures ranging from 300°F to 500°F, these organic materials don’t just sit there—they undergo a chemical transformation.
The heat causes these substances to polymerize, essentially turning liquid grease into solid, glass-like deposits. Think of it like creating a natural plastic coating on your oven door, except this coating is brown, crusty, and definitely not intentional. The longer you cook at high temperatures, the more layers of this carbonized material build up, creating that thick, stubborn film that laughs in the face of ordinary cleaning products.
The Chemistry of Burnt-On Grease and Carbon Deposits
Let’s get a bit nerdy for a moment—understanding the chemistry helps you choose the right oven glass cleaner. Burnt-on grease is primarily composed of triglycerides (fats) that have undergone thermal decomposition. When heated repeatedly, these triglycerides break down and recombine into complex polymers containing carbon-carbon bonds that are incredibly resistant to simple soap and water.
Carbon deposits, on the other hand, are the final stage of this process. They’re essentially charred organic matter that has lost most of its hydrogen and oxygen, leaving behind pure carbon structures. This explains why these stains appear black or dark brown and why they’re so notoriously difficult to remove—you’re literally trying to dissolve something that’s chemically similar to charcoal.
The most effective oven glass cleaners work by either:
- Breaking down these polymer bonds chemically (alkaline cleaners)
- Physically abrading the surface (gentle abrasives)
- Softening the deposits with solvents and surfactants
- Combining multiple approaches for maximum effectiveness
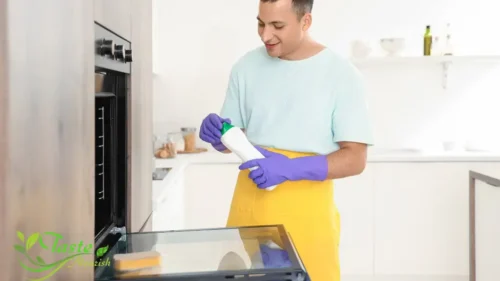
Types of Oven Glass Cleaners Available
Commercial Chemical Cleaners
Walk down any cleaning aisle, and you’ll find shelves stocked with specialized oven glass cleaners promising miracle results. These commercial products typically contain powerful alkaline compounds like sodium hydroxide (lye) or potassium hydroxide, combined with surfactants, solvents, and sometimes abrasive particles.
Popular commercial options include:
| Product Type | Active Ingredients | Best For | Average Cost |
|---|---|---|---|
| Foam Sprays | Sodium hydroxide, surfactants | Heavy buildup, ease of use | $5-$8 |
| Gel Cleaners | Alkaline compounds, thickeners | Vertical surfaces, targeted cleaning | $6-$10 |
| Cream Cleansers | Mild abrasives, detergents | Light to medium stains | $4-$7 |
| Heavy-Duty Sprays | Strong alkalines, solvents | Extreme carbonization | $8-$12 |
These commercial cleaners work fast—sometimes in as little as 5-10 minutes—because they’re formulated with concentrated chemicals that rapidly break down organic deposits. However, they come with strong fumes and require careful handling.
Natural and Homemade Solutions
If you prefer to avoid harsh chemicals or simply want to use what’s already in your pantry, natural oven glass cleaners can be surprisingly effective. The key ingredients in most DIY solutions are:
- Baking soda (sodium bicarbonate): A mild abrasive and alkaline compound that gently scrubs while neutralizing acids
- Vinegar (acetic acid): Cuts through grease and creates a fizzing reaction with baking soda that helps lift debris
- Dish soap: Contains surfactants that break down oils and fats
- Hydrogen peroxide: A mild bleaching agent that helps break down organic stains
- Lemon juice: Natural acid and degreaser with fresh scent
These natural solutions typically require longer contact time and more elbow grease than commercial products, but they’re safer for homes with children, pets, or individuals sensitive to chemical fumes.
Steam Cleaning Methods
Steam cleaning represents a chemical-free approach that uses heat and moisture to soften carbonized deposits. Some modern ovens come with built-in steam-cleaning functions, but you can also achieve similar results manually by placing a pan of boiling water in your oven and letting the steam work its magic for 20-30 minutes.
The science here is straightforward: steam penetrates the porous structure of burnt-on deposits, causing them to swell and soften. This makes them much easier to wipe away. However, steam cleaning alone may not handle extremely heavy buildup—it works best as a maintenance method or combined with other cleaning approaches.
Abrasive vs. Non-Abrasive Options
Here’s where you need to tread carefully. Your oven glass can handle some abrasion, but too much force or the wrong material can create permanent scratches that make future cleaning harder and ruin the appearance of your door.
Safe abrasives for oven glass:
- Baking soda paste
- Non-scratch scouring pads (nylon or microfiber)
- Magic erasers (melamine foam)
- Cream cleansers with fine abrasive particles
Avoid these on oven glass:
- Steel wool
- Coarse sandpaper
- Brillo pads
- Any abrasive labeled for tough surfaces
DIY Oven Glass Cleaner Recipes That Actually Work
The Baking Soda and Vinegar Power Duo
This classic combination is the MVP of natural oven glass cleaners, and there’s solid science behind why it works so well. Here’s the detailed recipe:
Ingredients:
- 1/2 cup baking soda
- 3 tablespoons water (adjust for paste consistency)
- 1 cup white vinegar
- Spray bottle
Instructions:
- Mix baking soda with water to create a thick, spreadable paste
- Apply the paste generously to your oven glass door
- Let it sit for at least 15-20 minutes (overnight for heavy buildup)
- Fill your spray bottle with vinegar
- Spray the vinegar over the baking soda paste
- Watch it fizz and bubble—this reaction helps lift grime
- Scrub gently with a non-scratch sponge
- Wipe clean with a damp microfiber cloth
- Repeat if necessary for stubborn spots
Why this works: The alkaline baking soda begins breaking down acidic grease compounds, while the acetic acid in vinegar continues the chemical attack from the opposite direction. The fizzing reaction creates agitation that physically helps separate deposits from the glass surface.
Dawn Dish Soap and Hydrogen Peroxide Magic
This combination creates a powerful yet gentle oven glass cleaner that tackles grease with professional-level effectiveness.
Ingredients:
- 1/4 cup Dawn dish soap (original blue formula works best)
- 1/2 cup hydrogen peroxide (3% solution)
- 1/4 cup baking soda
Instructions:
- Mix all ingredients in a bowl to create a smooth paste
- Apply to the oven glass in a thick layer
- Let sit for 30-45 minutes
- Use a damp sponge to work the paste into stains
- Rinse thoroughly with clean water
- Dry with a lint-free cloth for streak-free results
Pro tip: The Dawn soap contains powerful surfactants originally designed for cleaning wildlife after oil spills—if it can handle petroleum, it can definitely handle your oven grease.
Lemon and Salt Natural Scrub
For those who prefer an all-natural approach with a fresh scent, this lemon-based cleaner provides mild acidity and gentle abrasion.
Ingredients:
- 2 lemons, halved
- 1/4 cup coarse sea salt
- Warm water
Instructions:
- Squeeze lemon juice into a bowl and reserve the halves
- Mix juice with salt to create a slurry
- Dip the cut side of a lemon half into the salt mixture
- Use the lemon as both applicator and scrubber on the glass
- Work in circular motions across all stained areas
- Let the mixture sit for 10-15 minutes
- Wipe clean with a damp cloth
- Rinse thoroughly
This method works wonderfully for light to medium stains and leaves your kitchen smelling amazing.
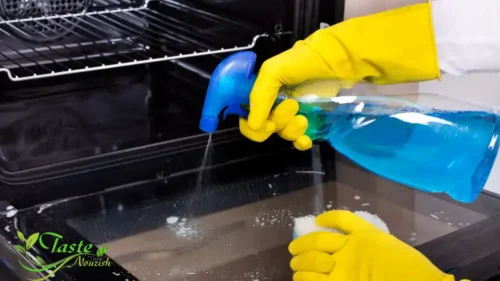
Step-by-Step Guide to Cleaning Your Oven Glass Door
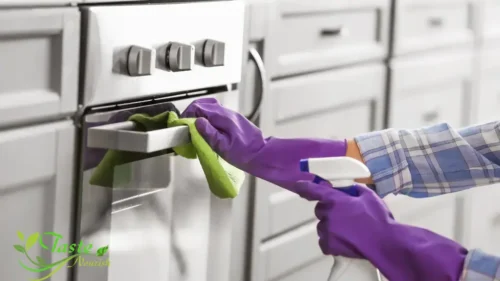
Preparing Your Workspace and Safety Precautions
Before you dive into cleaning, proper preparation prevents problems and protects both you and your kitchen. Here’s your pre-cleaning checklist:
Safety gear needed:
- Rubber gloves (chemical-resistant for commercial cleaners)
- Safety glasses (especially with spray products)
- Old clothing or apron
- Proper ventilation—open windows and turn on exhaust fans
Workspace preparation:
- Make sure your oven is completely cool (wait at least 2 hours after cooking)
- Lay towels or newspaper on the floor beneath the oven door
- Remove oven racks if they’ll interfere with cleaning
- Have all your cleaning supplies within arm’s reach
- Set a timer so you don’t forget about soaking products
Temperature tip: Never clean hot oven glass—the thermal shock from cold cleaning solutions can potentially crack the glass. Always ensure the surface is at room temperature.
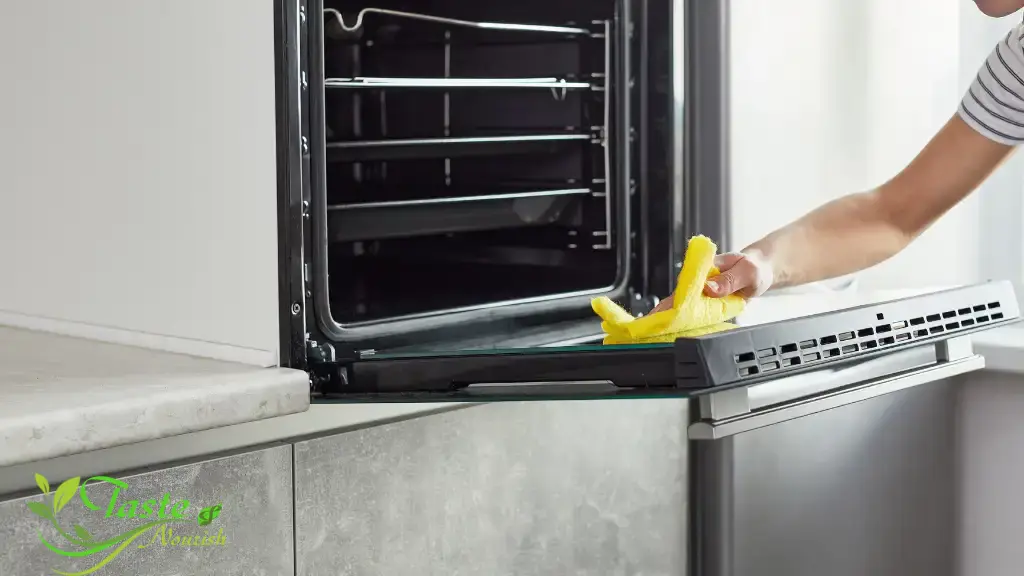
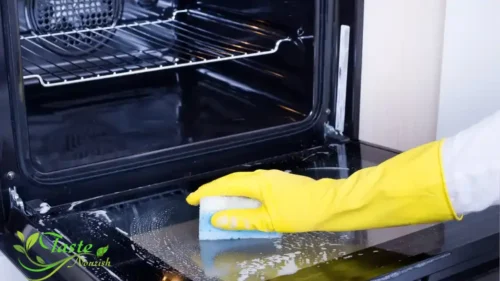
The Exterior Glass Cleaning Process
The outside of your oven door typically has lighter soiling since it’s not exposed to the extreme heat and splattering that occurs inside. Here’s how to tackle it effectively:
Step-by-step exterior cleaning:
- Initial wipe-down: Use a damp microfiber cloth to remove loose debris and dust
- Apply your chosen cleaner: Whether commercial or homemade, apply evenly across the entire surface
- Let it dwell: Follow product instructions for timing (typically 5-15 minutes)
- Scrub gently: Use circular motions with a non-scratch sponge, applying more pressure to stained areas
- Rinse thoroughly: Multiple wipes with clean, damp cloths to remove all residue
- Dry and polish: Use a dry microfiber cloth to prevent water spots and streaks
Pro technique: For a streak-free finish, do a final wipe with crumpled newspaper or a coffee filter—both absorb moisture without leaving lint.
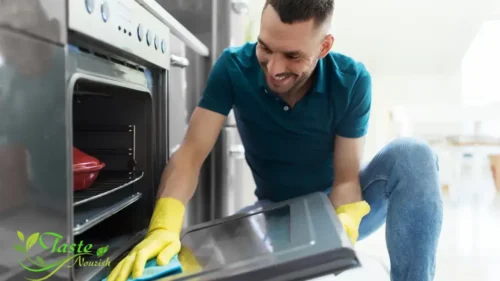
Tackling the Interior Glass Surface
The inside glass is where the real battle happens. This surface faces the full fury of your cooking adventures and requires more aggressive treatment.
Intensive interior cleaning method:
- Pre-treat with steam: Place a heat-safe bowl of boiling water in the oven, close the door, and wait 20 minutes. The steam softens deposits.
- Apply heavy-duty cleaner: Use a thick layer of your chosen product (baking soda paste works excellently here)
- Extended soak time: For heavy buildup, leave the cleaner on for 2-4 hours or overnight. Cover with plastic wrap to prevent drying.
- Scrub strategically: Work in sections, using the following pattern:
- Start at the top and work down
- Use horizontal strokes for even coverage
- Apply firm but not excessive pressure
- Reapply cleaner to stubborn spots
- Razor blade technique (advanced): For extremely stubborn spots:
- Hold a single-edge razor blade at a 45-degree angle
- Keep the glass wet with cleaning solution
- Use short, gentle scraping motions
- Never scrape dry glass—this causes scratches
- Final rinse cycle: Make at least three passes with clean, damp cloths to ensure all cleaner residue is removed
Dealing with Between-the-Glass Grime
Here’s the frustrating reality many homeowners face: sometimes the worst grime isn’t on the accessible surfaces—it’s trapped between the double-pane glass layers. This happens when the seal between glass panes fails, allowing grease-laden steam to penetrate during cooking.
Signs you have between-glass contamination:
- Stains that don’t respond to cleaning either surface
- Cloudiness that appears to be “inside” the glass
- Streaks that are visible but can’t be felt
- Discoloration that looks deeper than surface stains
If you’ve confirmed the grime is between the panes, you have two options: disassemble the door yourself (covered in the next section) or call a professional. Some newer ovens have doors designed for easy disassembly, while older models may require more technical knowledge.
Advanced Techniques for Stubborn Stains
The Overnight Paste Method
Sometimes even the toughest oven glass cleaner needs time to work its magic. The overnight method maximizes contact time for truly stubborn, carbonized deposits.
Advanced overnight technique:
- Create an enhanced paste:
- 1 cup baking soda
- 1/4 cup dish soap
- 2-3 tablespoons hydrogen peroxide
- Mix until you have a thick, yogurt-like consistency
- Application process:
- Apply a 1/4-inch thick layer across all problem areas
- Cover completely with plastic wrap to prevent drying
- Press the plastic wrap into the paste to ensure contact
- Leave overnight (8-12 hours)
- Morning removal:
- Remove plastic wrap carefully
- The paste will have penetrated deep into the carbon deposits
- Use a damp sponge to work the softened grime loose
- Rinse multiple times with clean water
- Assess results and repeat if necessary
Why this works so well: Extended contact time allows cleaning agents to continue breaking down chemical bonds in carbonized materials. The paste stays moist under plastic wrap, maintaining its cleaning action for hours instead of minutes.
Using Ammonia Fumes Safely
Ammonia vapor cleaning is a commercial kitchen secret that works remarkably well on oven glass, but it requires careful handling and proper ventilation.
Safe ammonia vapor method:
Warning: Only use this method with proper ventilation and never mix ammonia with other cleaners, especially bleach.
- Setup:
- Place 1/2 cup household ammonia in a heat-safe bowl
- Put the bowl inside your oven on the bottom rack
- Close the oven door
- Leave overnight (minimum 8 hours)
- The next morning:
- Open windows before opening the oven
- Air out the kitchen for 10-15 minutes
- Remove the ammonia bowl
- Wipe the glass with a damp cloth—grime should come off easily
- Safety considerations:
- Never turn the oven on with ammonia inside
- Wear gloves and avoid breathing fumes directly
- Keep children and pets away during treatment
- Dispose of ammonia down the drain with plenty of water
The ammonia fumes penetrate and soften even the most stubborn carbonized deposits without requiring any scrubbing. However, this method should be reserved for extremely dirty ovens due to the powerful fumes involved.
Razor Blade Scraping: When and How to Use It
A razor blade is the nuclear option for oven glass cleaning—powerful but potentially dangerous if misused. Use this technique only as a last resort for deposits that resist all other methods.
Proper razor blade technique:
Equipment needed:
- Single-edge razor blade or dedicated glass scraper tool
- Spray bottle with soapy water or cleaning solution
- Steady hand and good lighting
Step-by-step process:
- Thoroughly wet the surface: Keep the glass constantly wet with cleaning solution throughout the process
- Correct angle: Hold the blade at a 45-degree angle to the glass—this is critical. Too steep damages the glass; too shallow is ineffective.
- Direction of travel: Always push the blade forward—never pull backward, as this increases scratch risk
- Short strokes: Use 2-3 inch strokes rather than long sweeps for better control
- Constant relubrication: Spray more solution every few strokes
- Inspect the blade: If you see any chips or nicks, replace it immediately—damaged blades scratch glass
- Overlap your strokes: Cover the entire surface systematically
- Final cleaning: After scraping, clean the entire surface with your regular oven glass cleaner to remove residue
What you can safely scrape:
- Carbonized sugar (from spills)
- Baked-on cheese
- Hardened grease deposits
- Paint or adhesive residue
What you should never scrape:
- Scratches (this makes them worse)
- The actual glass surface when dry
- Textured or patterned glass
- Damaged or weakened glass
Commercial Oven Glass Cleaners: Product Reviews and Comparisons
Let’s cut through the marketing hype and examine what actually works in the world of commercial oven glass cleaners.
Performance comparison table:
| Product | Effectiveness (1-10) | Ease of Use | Fume Intensity | Price Range | Best For |
|---|---|---|---|---|---|
| Easy-Off Professional | 9 | 8 | High | $7-$10 | Heavy carbonization |
| Bar Keeper’s Friend | 7 | 9 | Low | $4-$6 | Light to medium stains |
| Astonish Oven Cleaner | 8 | 7 | Medium | $6-$8 | All-purpose cleaning |
| Carbona Oven Cleaner | 8 | 8 | Medium | $5-$7 | Biodegradable option |
| Goo Gone Oven & Grill Cleaner | 7 | 9 | Low | $6-$9 | Grease-focused cleaning |
Detailed product insights:
Easy-Off Professional: This powerhouse contains sodium hydroxide at professional strength, making it incredibly effective but also producing strong fumes. It’s the go-to for extreme cases where years of neglect have created thick carbon deposits. However, you’ll definitely want respiratory protection and excellent ventilation. Application is simple—spray on cold surfaces, wait 5-20 minutes depending on buildup severity, and wipe clean.
Bar Keeper’s Friend: A gentler option that uses oxalic acid as its primary cleaning agent. This cream cleanser provides mild abrasion combined with chemical cleaning power. It’s excellent for regular maintenance and for people who prefer less aggressive products. The learning curve is minimal, and you can use it on multiple kitchen surfaces beyond just oven glass.
Astonish Oven Cleaner: Popular in Europe and increasingly available globally, this paste-based cleaner strikes a good balance between effectiveness and safety. It clings to vertical surfaces well and doesn’t drip, making it ideal for door cleaning. The formula is less caustic than Easy-Off but more powerful than Bar Keeper’s Friend.
Common Mistakes to Avoid When Cleaning Oven Glass
Products That Can Damage Your Oven Door
Not all cleaning products are created equal, and some can actually harm your oven glass. Here are the critical “never use” items:
Dangerous products and why to avoid them:
- Oven cleaners on self-cleaning oven glass: Many self-cleaning ovens have special glass coatings that can be damaged by strong alkaline cleaners. Check your manual before using commercial products.
- Bleach: While bleach is a powerful cleaner, it’s ineffective on carbon deposits and grease. It can also damage metal components around the glass and create toxic fumes if mixed with other cleaners.
- Abrasive powders: Products like Comet or Ajax contain harsh abrasives that scratch oven glass, creating permanent damage and surfaces that collect more grime.
- Ammonia + bleach combination: This creates toxic chloramine gas—never mix these, ever, regardless of what you’re cleaning.
- Furniture polish: Some people mistakenly use this for streak-free shine, but it creates a flammable residue inside your oven.
- Acidic cleaners on hot glass: Vinegar, lemon juice, and other acids can cause thermal etching if applied to glass that’s still warm.
Temperature Considerations
Temperature management is crucial for both cleaning effectiveness and glass safety. Here’s what you need to know:
The temperature danger zones:
- Above 150°F: Risk of cleaner evaporating before it can work, creating ineffectiveness and increased fume exposure
- Above 200°F: Potential for thermal shock if cold liquids are applied
- Above 250°F: Serious burn risk and potential glass damage
Optimal cleaning temperatures:
- Ideal range: 70-90°F (room temperature)
- Warm water for rinsing: 100-110°F maximum
- For stuck-on food: Slightly warm glass (100-120°F) can help soften deposits, but most experts recommend cool glass for safety
The self-cleaning cycle myth: Many people think running the self-clean cycle will clean the glass. While it does burn off interior grime, the exterior glass and between-pane areas remain unaffected. Plus, the extreme heat (900°F+) can actually bake stains more permanently onto the glass surface.
Maintenance Tips to Keep Your Oven Glass Sparkling
Weekly Quick-Clean Routines
Prevention is infinitely easier than restoration. Implementing a simple weekly routine keeps your oven glass from reaching that “how did it get this bad?” stage.
The 5-minute weekly maintenance plan:
Materials needed:
- Spray bottle with 1:1 vinegar-water solution
- Microfiber cloth
- Baking soda (for spot treatment)
Monday through Friday (1 minute each):
- Let the oven cool after use
- Spray the glass with vinegar solution
- Wipe down with a microfiber cloth
- This prevents fresh splatters from baking on
Saturday deep clean (5 minutes):
- Make a small batch of baking soda paste
- Apply to any visible spots or stains
- Let sit for 5-10 minutes while you clean other surfaces
- Scrub gently and wipe clean
- Final polish with dry cloth
Results: Following this routine prevents 90% of serious buildup, saving you from ever needing those marathon cleaning sessions.
Preventing Future Buildup
Smart cooking habits dramatically reduce oven glass soiling. Here’s how to adjust your routine:
Cooking technique adjustments:
- Cover your dishes: Use lids, foil tents, or oven-safe covers to contain splatters, especially when roasting fatty meats or cooking saucy dishes at high temperatures.
- Lower rack positioning: Place items prone to bubbling over or splattering (casseroles, pies) on lower racks, away from the door glass.
- Temperature moderation: When possible, cook at slightly lower temperatures for longer times rather than blasting everything at maximum heat. This reduces splatter intensity.
- Immediate wipe-downs: If you notice a spill or splatter while cooking, wipe it up as soon as the oven cools enough to safely do so—usually within 30 minutes.
- Strategic baking sheet placement: Place a baking sheet on the rack below dishes that might drip or bubble over. This catches spills before they hit the oven floor and get aerosolized onto the glass.
Protective accessories:
- Oven liners: Silicone or PTFE-coated liners on the bottom rack catch drips
- Splatter screens: Oven-safe mesh screens can cover certain dishes
- Roasting bags: Contain moisture and grease for meats
Cleaning Between Double-Pane Oven Glass
When to Disassemble Your Oven Door
Double-pane oven glass is designed to provide insulation and improve energy efficiency, but this design creates a frustrating problem when grime gets trapped inside. Here’s how to determine if disassembly is necessary:
Diagnostic checklist:
✓ Confirmed internal contamination: Stains visible from both sides that don’t respond to cleaning either surface
✓ Failed door seal: Moisture or condensation appearing between panes
✓ Manufacturer accessibility: Your oven model has doors designed for owner disassembly (check your manual)
✓ Warranty status: Disassembly might void warranties on newer models—verify before proceeding
✓ Your comfort level: This requires moderate DIY skills and patience
When NOT to disassemble:
- Active warranty that prohibits owner service
- Uncertain about your technical abilities
- Cracked or damaged glass
- Vintage or specialty ovens without clear documentation
Step-by-Step Disassembly Guide
Important disclaimer: Procedures vary significantly by manufacturer and model. Always consult your specific oven’s service manual. This guide provides general principles common to many models.
Tools and materials needed:
- Screwdriver set (Phillips and flathead)
- Work surface with soft towels or blankets
- Digital camera or smartphone (for documentation)
- Small containers for screws and parts
- Your oven’s model number and manual
General disassembly process:
Phase 1: Door removal
- Document everything: Take photos at each step for reassembly reference
- Open the door fully (or to the first stop position, depending on model)
- Locate hinge locks: These are usually clips or levers at the base of each hinge
- Engage the locks: Flip them up or down (varies by model) to release the hinges
- Close the door partially (about 45 degrees)
- Lift the door up and away: Pull toward you while lifting—the door should slide off the hinges
- Place on your padded work surface: Position glass-side up
Phase 2: Glass panel separation
- Locate retaining screws: Typically found along the top edge or sides of the inner door panel
- Remove screws systematically: Keep them organized by location
- Carefully separate the panels: The inner glass panel(s) should lift out—note the order and orientation
- Identify gaskets and spacers: These ensure proper alignment and must be replaced in the same configuration
Phase 3: Cleaning
- Clean all glass surfaces thoroughly: Use your preferred oven glass cleaner on all sides
- Clean the door frame channels: Grease and debris accumulate here
- Inspect gaskets: Replace any that are compressed, torn, or degraded
- Dry everything completely: Moisture trapped during reassembly causes future problems
Phase 4: Reassembly
- Work in reverse order: Use your photos as reference
- Ensure gaskets are properly seated: Misalignment causes future contamination
- Tighten screws evenly: Work in a cross-pattern to prevent warping
- Verify glass orientation: Some panels have coatings on specific sides
- Rehang the door: Reverse the removal process, ensuring hinges engage fully
- Test operation: Open and close several times to verify proper function
Pro tips for success:
- Take more photos than you think necessary
- Work on a clean, organized surface
- Don’t force anything—if it’s not fitting easily, you’re missing something
- Label screw containers by their location
- Have a helper available for the physical manipulation of the door
Health and Environmental Considerations
Toxic Fumes and Ventilation
The chemicals in many oven glass cleaners aren’t just unpleasant—they can pose real health risks if proper precautions aren’t followed. Understanding these risks helps you make informed decisions.
Common chemical culprits and their effects:
Sodium hydroxide (lye):
- Found in: Most heavy-duty oven cleaners
- Health effects: Severe respiratory irritation, chemical burns on skin and eyes, throat damage if inhaled
- Exposure symptoms: Coughing, burning sensation, difficulty breathing
- Safe exposure limit: Minimal—always use with maximum ventilation
Ammonia:
- Found in: Glass cleaners and some oven cleaning formulas
- Health effects: Mucous membrane irritation, headaches, nausea
- Particularly dangerous when: Combined with bleach (creates toxic chloramine gas)
- Safe exposure limit: Brief exposure to diluted solutions with ventilation
Volatile organic compounds (VOCs):
- Found in: Aerosol cleaners, petroleum-based solvents
- Health effects: Headaches, dizziness, long-term organ damage with repeated exposure
- Indoor air quality impact: Can persist for hours after use
Essential ventilation protocol:
- Before cleaning begins:
- Open all nearby windows
- Turn on kitchen exhaust fan at maximum setting
- Open windows in adjacent rooms to create cross-ventilation
- Remove children and pets from the area
- During cleaning:
- Take breaks in fresh air if you feel lightheaded
- Never lean directly over cleaning products
- Wear respiratory protection for strong chemicals (N95 or vapor respirator)
- After cleaning:
- Ventilate for at least 30 minutes after finishing
- Run exhaust fans for an additional hour
- Wipe down surfaces that might have airborne residue
Eco-Friendly Cleaning Alternatives
For environmentally conscious households or those with chemical sensitivities, effective green alternatives exist:
Environmental impact comparison:
| Cleaning Method | Carbon Footprint | Water Pollution | Packaging Waste | Indoor Air Quality |
|---|---|---|---|---|
| Commercial Chemical | High | High | Moderate-High | Poor |
| DIY Baking Soda/Vinegar | Low | Minimal | Minimal | Excellent |
| Steam Cleaning | Low (energy use) | None | None | Excellent |
| Eco-Certified Products | Moderate | Low | Moderate | Good |
Truly green oven glass cleaner options:
Option 1: Zero-waste powder cleaner
- Mix equal parts baking soda, washing soda, and salt
- Store in a reusable container
- Apply with a damp cloth when needed
- Rinse with water and vinegar
Option 2: Essential oil-enhanced paste
- 1 cup baking soda
- 2 tablespoons castile soap
- 10 drops orange or lemon essential oil
- Water to desired consistency
The citrus oils contain d-limonene, a natural solvent that effectively breaks down grease while providing pleasant scent.
Option 3: Enzymatic cleaner
- Enzyme-based cleaners use biological processes to break down organic materials
- Available from eco-friendly brands
- Require longer dwell time but work without harsh chemicals
- Completely biodegradable
Certification labels to look for:
- EPA Safer Choice
- Green Seal Certified
- EcoLogo
- Leaping Bunny (cruelty-free)
- Biodegradable Products Institute (BPI) certified
Troubleshooting: When Professional Help Is Needed
Despite your best efforts, some oven glass situations require professional intervention. Knowing when to call in experts saves time, prevents damage, and ensures safety.
Clear indicators for professional service:
1. Cracked or damaged glass
- Even hairline cracks compromise structural integrity
- Thermal stress during cooking can cause sudden failure
- DIY replacement often voids warranties
- Professionals ensure proper sealing and safety
2. Failed door seal allowing continuous contamination
- If you’ve cleaned between glass panes but contamination returns quickly
- Door gaskets may need specialized replacement
- Professional diagnosis identifies underlying problems
3. Extremely thick carbonization resistant to all methods
- Some commercial equipment has specialized removal techniques
- Professional-grade chemicals and tools
- Restoration may be more economical than replacement
4. Manufacturer-specific complications
- High-end brands (Viking, Wolf, Thermador) often have proprietary designs
- Authorized service technicians have specialized training
- May be required to maintain warranty coverage
5. Self-cleaning function damage
- If your self-cleaning cycle has caused discoloration or damage
- May indicate temperature sensor or control board issues
- Requires diagnostic equipment beyond typical homeowner tools
What to expect from professional service:
- Cost range: $100-$300 for glass cleaning/replacement
- Service time: 1-3 hours depending on complexity
- Warranty coverage: Parts typically warrantied 90 days to 1 year
- Additional benefits: Full oven inspection, safety checks, performance optimization
Finding qualified professionals:
- Check manufacturer’s authorized service provider network
- Read reviews on HomeAdvisor, Angie’s List, or local equivalents
- Verify licensing and insurance
- Request estimates from multiple providers
- Ask about experience with your specific brand/model
Cost Analysis: DIY vs. Professional Cleaning Services
Let’s break down the real economics of oven glass cleaning to help you make informed decisions.
DIY cost breakdown:
| Item | Initial Investment | Cost Per Cleaning | Annual Cost (Monthly Cleaning) |
|---|---|---|---|
| Baking soda (5 lb) | $8 | $0.20 | $2.40 |
| White vinegar (1 gal) | $4 | $0.30 | $3.60 |
| Dish soap | $3 | $0.10 | $1.20 |
| Microfiber cloths (pack of 6) | $10 | $0.00 (reusable) | $10.00 (replacement) |
| Rubber gloves | $5 | $0.00 | $5.00 (replacement) |
| Total DIY | $30 | $0.60 | $22.20 |
Commercial product costs:
| Product Type | Per Bottle | Uses Per Bottle | Cost Per Cleaning | Annual Cost |
|---|---|---|---|---|
| Basic spray cleaner | $6 | 8-10 | $0.75 | $9.00 |
| Heavy-duty gel | $9 | 6-8 | $1.30 | $15.60 |
| Premium formula | $12 | 8-10 | $1.50 | $18.00 |
Professional service costs:
- One-time deep clean: $75-$150
- Regular maintenance package: $50-$80 per visit (quarterly)
- Full oven cleaning with glass: $150-$300
- Annual professional service: $200-$320 (quarterly maintenance)
Time investment comparison:
- DIY light cleaning: 10-15 minutes
- DIY deep cleaning: 1-2 hours (including soak time)
- Professional service: 0 hours (your time) / 1-3 hours (their time)
Value analysis:
For most homeowners, DIY cleaning makes financial sense for regular maintenance. The break-even point for professional service typically occurs when:
- You value your time at $40+ per hour
- You have physical limitations making the work difficult
- Your oven requires frequent cleaning due to heavy use
- You’re dealing with years of neglect requiring restoration
Optimal strategy: Combine approaches—maintain regularly with DIY methods, and schedule professional service annually for deep cleaning and maintenance verification.
Conclusion – Your Path to Pristine Oven Glass
Cleaning oven glass doesn’t have to be the dreaded chore you’ve been avoiding for months—or let’s be honest, years. Armed with the right oven glass cleaner knowledge, techniques, and products, you can transform even the grungiest, most carbonized oven door into a crystal-clear window that lets you actually see your culinary creations baking to perfection.
The key takeaways from this comprehensive guide are simple:
Understanding beats scrubbing: When you know what causes those stubborn stains—polymerized grease, carbonized deposits, heat-transformed organic materials—you can choose cleaning methods that work with chemistry rather than against it.
Prevention trumps restoration: A minute of maintenance after each use saves hours of aggressive cleaning later. Those simple weekly routines we discussed might seem tedious, but they’re infinitely preferable to marathon scrubbing sessions.
Gentle works: You don’t need military-grade chemicals to achieve professional results. Many of the most effective oven glass cleaners combine common household ingredients like baking soda, vinegar, and dish soap. Save the heavy-duty commercial products for truly extreme situations.
Safety always comes first: Whether you’re working with natural or chemical cleaners, proper ventilation, protective equipment, and temperature awareness prevent injuries and health problems.
Remember, your oven glass is more than just a window—it’s a functional part of your appliance that helps with temperature regulation, energy efficiency, and cooking precision. Keeping it clean isn’t vanity; it’s proper appliance maintenance that extends the life of your oven and improves cooking performance.
So take that first step. Pick your cleaning method—whether it’s the simple baking soda paste, a trusted commercial product, or the overnight treatment for seriously neglected glass. Set aside the time, gather your materials, and reclaim that clear view into your oven. Your future self (and your dinner guests) will thank you.
And here’s a final thought: once you see that pristine, sparkling glass reflecting your kitchen lights, you’ll be motivated to keep it that way. There’s something genuinely satisfying about cooking in an oven that looks as good as the food coming out of it. You’ve got this!
FAQs About Oven Glass Cleaning
1. Can I use oven cleaner on a self-cleaning oven’s glass door?
This depends entirely on your oven’s specific model and manufacturer recommendations. Many self-cleaning ovens have special glass coatings that can be damaged by the strong alkaline chemicals in standard oven cleaners. Before using any commercial product, check your owner’s manual or contact the manufacturer. Generally, milder solutions like baking soda paste are safer for self-cleaning oven glass. If you’ve already used the self-cleaning cycle and your glass is still dirty, remember that the self-clean function primarily addresses the interior cavity, not the glass surfaces where you can see buildup. For self-cleaning ovens, gentle DIY methods are typically your safest bet unless the manufacturer specifically approves certain commercial products.
2. How do I remove white cloudy stains from my oven glass that won’t come off with regular cleaning?
White cloudy stains or haziness on oven glass usually result from one of three causes: mineral deposits from hard water (if you’ve used water-based cleaning), etching from acidic cleaners used on hot glass, or damage to the glass coating from harsh chemicals. For mineral deposits, try cleaning with undiluted white vinegar—apply it generously, let it sit for 10-15 minutes, then scrub with a non-abrasive pad. If the cloudiness is actually etching or coating damage, this is unfortunately permanent and cannot be reversed with cleaning. You can make it less noticeable by thoroughly cleaning and polishing the glass, but complete restoration may require professional glass replacement. To prevent future cloudiness, always ensure your oven glass is completely cool before applying any cleaning products, and avoid using ammonia or harsh acidic cleaners on the interior glass surface.
3. Is it safe to use a razor blade on oven glass, and will it cause scratches?
When used correctly, a single-edge razor blade or glass scraper is safe for oven glass and won’t cause scratches. The key is proper technique: always keep the glass wet with cleaning solution, hold the blade at a 45-degree angle, use only forward pushing motions (never pull backward), and replace the blade immediately if you see any chips or damage. Think of it like using a squeegee—you’re gliding over the surface, not digging into it. That said, razor blades should be your last resort for extremely stubborn, baked-on deposits that resist all other methods. Never use a razor blade on textured, patterned, or damaged glass, and avoid using it on the coated glass found in some modern ovens. If you’re uncomfortable with this technique or your oven has specialized glass, stick with chemical and abrasive paste methods instead. The razor works because it physically lifts carbonized deposits without applying the downward pressure that causes scratches, but only when wielded with care and the proper angle.
4. How often should I clean my oven glass to prevent heavy buildup?
The ideal cleaning frequency depends on your cooking habits, but here’s a practical guideline: wipe down the exterior glass weekly and the interior glass after every 3-4 uses, or at minimum monthly. If you frequently cook foods that splatter (roasted meats, casseroles, pizzas), you’ll need more frequent attention. The golden rule is this: clean visible splatters within 24 hours of them occurring, before they undergo additional heating cycles that bake them permanently onto the glass. Think of it this way—each time you heat your oven, any existing grime undergoes another round of carbonization, becoming exponentially harder to remove. A quick 2-minute wipe with vinegar solution after the oven cools prevents that 2-hour scrubbing marathon later. For people who cook daily, implementing a weekend 5-minute maintenance routine (like the one outlined earlier in this article) virtually eliminates the need for aggressive deep cleaning. Those who use their oven only occasionally can get away with monthly thorough cleaning. The investment in frequent light cleaning is minimal compared to the time, effort, and harsh chemicals required for heavy-duty restoration.
5. What’s the difference between cleaning products that work on oven glass versus regular glass cleaners?
Regular glass cleaners (like Windex) are formulated to handle fingerprints, dust, and light smudging on windows and mirrors—they contain ammonia or alcohol-based solvents and are designed to evaporate quickly for streak-free results. Oven glass cleaners, however, must combat a completely different enemy: heat-polymerized grease, carbonized food particles, and baked-on deposits that have undergone chemical transformation at 350°F+ temperatures. These require alkaline compounds (sodium hydroxide, potassium hydroxide), surfactants that break down fats, and often gentle abrasives—ingredients not present in standard glass cleaners. Using regular window cleaner on seriously soiled oven glass is like bringing a water pistol to a firefight—it simply doesn’t have the chemical muscle to break down carbonized deposits. That said, for light maintenance cleaning of oven glass that’s already clean, standard glass cleaner works fine for removing fingerprints and light residue. The specialized oven glass cleaner only becomes necessary when you’re dealing with heat-transformed, baked-on grime. This is why DIY solutions using baking soda (alkaline) and dish soap (surfactants) can match or exceed the performance of commercial oven cleaners—they contain the right chemistry to tackle the problem, just at lower concentrations.