
Cleaning the Microwave Made Easy | Science-Backed Methods for a Spotless Kitchen (Step-by-Step)
Struggling with cleaning the microwave? You’re not alone. That stubborn splatter from last week’s dinner isn’t just unsightly—it’s a breeding ground for bacteria that could affect your health and your appliance’s efficiency. In this comprehensive guide, you’ll discover science-backed methods for cleaning the microwave that actually work, using simple natural ingredients you already have at home. From the powerful steam method to tackling burnt-on food and persistent odors, we’ll walk you through everything you need to transform your dirty microwave into a sparkling-clean appliance in just 15 minutes.
Why Microwave Cleaning Matters More Than You Think
You might be wondering, “Does it really matter if there’s a bit of dried food in there?” The short answer is yes—and here’s why.
Health Implications of Bacterial Growth
Your microwave isn’t just harboring yesterday’s lunch remnants. Those food particles create the perfect environment for bacterial growth. When food splatters and sits in the warm, moist environment of your microwave, bacteria multiply rapidly. Every time you heat something up, you’re potentially exposing your food to these microorganisms.
Research has shown that microwaves can harbor dangerous bacteria like E. coli, Salmonella, and Staphylococcus aureus if not cleaned regularly. Think about it—you’re heating food in a contaminated environment. That’s like trying to wash dishes in dirty water. The bacteria from old food residue can transfer to freshly heated meals, potentially causing foodborne illnesses.
Energy Efficiency and Appliance Longevity
Here’s something most people don’t realize: a dirty microwave has to work harder to heat your food. When food particles coat the interior surfaces, they absorb some of the microwave energy that should be heating your meal. This means longer cooking times, higher energy bills, and more wear and tear on your appliance.
Additionally, built-up grease and grime can damage the interior coating of your microwave over time, leading to rust and deterioration. Regular cleaning isn’t just about hygiene—it’s about protecting your investment and ensuring your microwave lasts for years to come.
Understanding What Makes Microwaves Dirty
Before we jump into cleaning methods, let’s understand our enemy. What exactly makes microwaves so prone to getting filthy?
The Science Behind Food Splatters and Grease Buildup
When you heat food in a microwave, water molecules in the food vibrate rapidly, creating heat from the inside out. This intense internal heating causes moisture to evaporate quickly, often explosively. That’s why your tomato soup looks like it had a temper tantrum inside your microwave.
Grease behaves differently. When fatty foods are heated, the oils become liquefied and can vaporize at high temperatures. These oil vapors rise and condense on cooler surfaces—namely, the ceiling and walls of your microwave. Over time, this creates that sticky, yellowish film that’s notoriously difficult to remove.
Why Microwave Interiors Are Breeding Grounds for Bacteria
Microwaves create the perfect storm for bacterial growth: warmth, moisture, and food particles. While the microwave radiation itself kills many bacteria during cooking, it doesn’t sanitize the interior surfaces. Between uses, when the microwave cools down, any remaining moisture and food residue become an ideal breeding ground.
The corners, seals, and hard-to-reach areas around the turntable are particularly problematic. These spots rarely get attention during quick wipe-downs, allowing bacteria colonies to establish themselves and multiply undisturbed.
Preparing to clean the microwave in advance
Like any worthwhile task, proper preparation makes all the difference between a frustrating chore and a satisfying accomplishment.
Safety Precautions Before You Start
First and foremost, unplug your microwave or turn off the circuit breaker. While you won’t be reaching into any electrical components, it’s always better to be safe. This also prevents anyone from accidentally turning it on while you’re cleaning inside.
Let the microwave cool completely if you’ve used it recently. The interior can remain hot for quite some time after use, and cleaning with hot surfaces can be uncomfortable and potentially dangerous.
The tools and materials you will need to clean the microwave
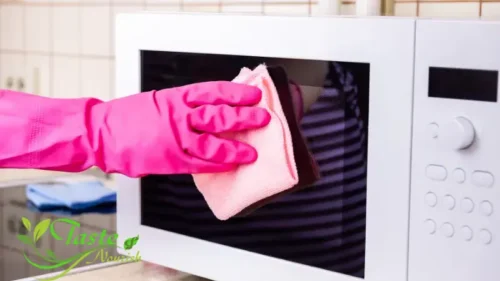
Gather these items before you begin: a microwave-safe bowl, white vinegar, lemon, baking soda, dish soap, microfiber cloths or sponges, rubber gloves, and paper towels. Having everything within reach prevents those frustrating mid-cleaning trips to fetch forgotten supplies.
For tougher jobs, you might also want a soft-bristled brush (an old toothbrush works perfectly), olive oil for stubborn grease, and a spray bottle for applying cleaning solutions.
The Steam Method: Nature’s Power Cleaner
Steam cleaning is hands-down the most effective, effortless method for cleaning microwaves. Let me explain why it works so brilliantly.
How Steam Loosens Dried Food Particles
When water vapor contacts dried food particles, it penetrates the hardened residue and rehydrates it. This process, called reconstitution, essentially reverses the drying process that made the food stick in the first place. The steam also heats the food particles, making fats and oils soften and liquefy again.
The beauty of steam is that it reaches everywhere—ceiling corners, wall crevices, and around the turntable edge. It does the hard work for you, transforming a scrubbing nightmare into a simple wipe-down job.
Step-by-Step Steam Cleaning Process
The basic steam method is remarkably simple. Fill a microwave-safe bowl with water (about one to two cups), place it in the center of your microwave, and heat on high power for three to five minutes until the water boils and steam fills the interior. Let it sit for another three to five minutes without opening the door—this allows the steam to continue working its magic.
Now let’s explore the variations that add extra cleaning power.
♦ Lemon Steam Method
Add the juice of one lemon to your bowl of water, and toss in the squeezed halves too. The citric acid in lemon acts as a natural degreaser and antimicrobial agent, while also leaving a fresh, clean scent. This method works exceptionally well for cutting through grease and neutralizing food odors simultaneously.
The acidity of lemon juice (typically around pH 2-3) helps break down alkaline food residues and mineral deposits from hard water. It’s particularly effective against stubborn stains that regular steam alone might not tackle.
♦ Vinegar Steam Method
Mix equal parts water and white vinegar in your bowl. Vinegar contains acetic acid, which is excellent for dissolving mineral deposits, cutting through grease, and killing bacteria and mold. The downside? The smell can be quite strong during the process, but it dissipates quickly once you’re done.
This method is especially powerful for microwaves that haven’t been cleaned in a while. The vinegar steam penetrates layers of built-up grime that plain water steam might not fully address.
♦ Baking Soda Steam Method
Add two tablespoons of baking soda to your bowl of water. Baking soda is mildly alkaline and works as a gentle abrasive when mixed with water. It’s particularly good for neutralizing acidic food stains and odors. This method is gentler than vinegar and better suited for regular maintenance cleaning.
The combination of steam heat and baking soda’s alkalinity creates a powerful yet non-corrosive cleaning solution that won’t damage your microwave’s interior coating.
Deep Cleaning the Microwave Interior
After steaming, most grime will wipe away easily, but sometimes you need to go deeper.
Tackling Stubborn Stains and Burnt Residue
For those truly stubborn spots that didn’t surrender to steam, make a paste using three parts baking soda to one part water. Apply this paste directly to the stain, let it sit for five to ten minutes, then gently scrub with a damp sponge or soft cloth.
Never use abrasive scrubbers or steel wool inside your microwave. These can scratch the interior coating, creating rough surfaces where food particles lodge more easily and potentially exposing the metal underneath to rust.
For burnt-on food that seems permanently attached, try the oil method: apply a small amount of olive oil to the spot, let it sit for a few minutes to soften the residue, then wipe away with a cloth dampened with soapy water.
Cleaning the Ceiling and Walls Effectively
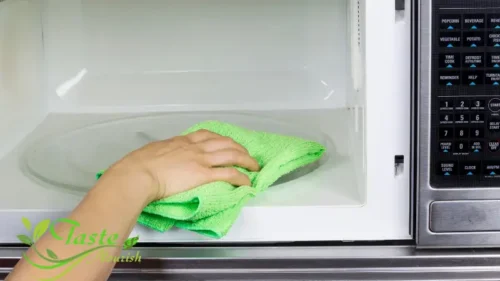
The ceiling is often the most neglected area, yet it’s where most grease accumulates. After steaming, spray a solution of dish soap and warm water onto the ceiling and walls, let it sit for a minute, then wipe with a clean, damp cloth.
Work in sections, and don’t forget to rinse with a clean, water-dampened cloth afterward. Soap residue left behind can create a film that attracts dirt and makes your microwave appear dingy even when it’s technically clean.
Don’t Forget These Often-Overlooked Areas
A truly clean microwave means attending to areas that don’t immediately catch your eye.
The Turntable and Roller Ring
Remove the glass turntable and wash it like you would a regular dish—in the sink with warm, soapy water or in the dishwasher if it’s dishwasher-safe. Don’t forget to remove and clean the plastic roller ring underneath. This piece often collects crumbs and liquid drips that create an ideal environment for bacterial growth.
Dry both pieces thoroughly before replacing them. Any remaining moisture can promote bacterial growth or create odors.
Door Seals and Hinges
The rubber seal around the door is a notorious dirt and grime collector. Use a damp cloth with a bit of dish soap to clean around the entire seal, paying special attention to the corners where food particles love to hide. A cotton swab or old toothbrush can help you reach into the grooves.
Clean door seals are essential not just for hygiene, but for maintaining your microwave’s efficiency. A compromised seal allows heat to escape, making your microwave work harder and use more energy.
The hinges and edges of the door exterior also need attention. Grease and food particles accumulate here over time, creating sticky spots that can interfere with the door closing properly.
Exterior Surfaces and Control Panel
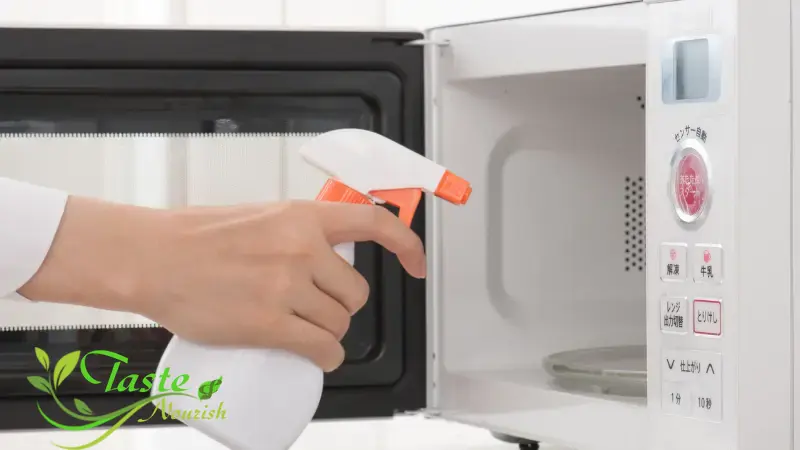
The outside of your microwave deals with fingerprints, cooking splatters from nearby stovetop activities, and general kitchen grime. Spray a cloth (never spray directly onto the control panel) with a mixture of water and a small amount of dish soap, then wipe down all exterior surfaces.
For stainless steel exteriors, wipe in the direction of the grain to avoid streaks. You can use a specialized stainless steel cleaner for extra shine, but a simple solution of water and white vinegar works just as well and costs much less.
The control panel deserves extra care. Never spray liquid directly onto it, as moisture can seep behind the buttons and damage the electronics. Instead, use a barely damp cloth to gently wipe the surface, then dry immediately with a clean towel.
Natural vs. Chemical Cleaners: What the Science Says
With countless cleaning products on the market, how do natural solutions stack up against commercial cleaners?
Effectiveness of Natural Cleaning Solutions
Studies have demonstrated that natural cleaning agents like vinegar, lemon juice, and baking soda are remarkably effective against most household bacteria and dirt. Acetic acid in vinegar and citric acid in lemon juice both have antimicrobial properties that can kill or inhibit many common bacteria.
Baking soda works through a different mechanism—its mild alkalinity and gentle abrasive properties make it excellent for physical removal of grime without scratching surfaces. When combined with the acids in vinegar or lemon, you get a fizzing reaction that helps lift dirt and provides additional cleaning action.
The environmental benefit is clear: these natural cleaners break down easily in water systems and don’t contribute to indoor air pollution or chemical exposure.
When Commercial Cleaners Are Necessary
That said, commercial cleaners have their place. If your microwave has developed mold (black or green growth), or if someone in your household has a compromised immune system, commercial disinfectants may be more appropriate for ensuring complete sanitization.
Look for cleaners specifically labeled as microwave-safe. Some harsh chemicals can damage the interior coating or leave residues that could transfer to food during subsequent heating. Always rinse thoroughly after using any commercial product.
For everyday cleaning and maintenance, though, natural solutions are more than adequate and offer a safer, more economical alternative.
Removing Persistent Odors from Your Microwave
Even after cleaning, sometimes ghost smells linger like uninvited guests at a party.
Why Smells Linger and How to Eliminate Them
Odors persist when volatile compounds from foods penetrate porous surfaces or lodge in hard-to-clean areas. Certain foods—fish, burnt popcorn, curry—contain particularly persistent aromatic compounds that bond to surfaces and continue releasing odor molecules long after the food is gone.
The key to odor removal is neutralization, not just masking. Air fresheners might temporarily cover up the smell, but they don’t solve the underlying problem.
Natural Deodorizing Techniques
- After thorough cleaning, place a bowl with a solution of one cup water and several tablespoons of baking soda in your microwave. Heat it for two to three minutes, then let it cool inside. Baking soda absorbs odors rather than just covering them up.
- Alternatively, place a bowl of activated charcoal or coffee grounds inside your microwave overnight (with the microwave turned off, of course). Both materials are highly porous and excel at absorbing odor molecules from the air.
- For persistent fish or seafood smells, the vanilla extract method works wonders: mix a tablespoon of vanilla extract with a cup of water, heat for one minute, and let it sit with the door closed for several hours. The pleasant vanilla scent is more than just a mask—vanilla compounds actually help neutralize fishy amine odors.
Special Situations: Dealing with Difficult Messes
Some microwave disasters require special attention and specific strategies.
Cleaning After Popcorn Disasters
Burnt popcorn isn’t just smelly—it leaves a brownish residue that seems determined to become a permanent part of your microwave. The burnt smell comes from compounds created when sugars and proteins in popcorn kernels overheat and essentially carbonize.
Start with the vinegar steam method to loosen the residue, then follow up with the baking soda paste on any remaining stains. For the smell, use the vanilla extract technique mentioned earlier. You may need to repeat the process several times for particularly bad burns.
Removing Melted Plastic Safely
Plastic that has melted onto your microwave interior is tricky because you can’t simply scrub it away without potentially damaging the surface beneath. First, determine if the affected area is the interior cavity or the exterior—the approach differs.
For interior melted plastic, create a paste of baking soda and water, apply it to the plastic residue, and let it sit for 15-20 minutes to soften the plastic. Then use a plastic scraper (never metal) to gently lift the softened plastic away. You may need to repeat this process several times.
For stubborn melted plastic, the freezer method can help: place ice cubes in a bag directly on the melted plastic for a few minutes. The cold makes the plastic brittle and easier to chip away gently. Follow up with the baking soda paste method to remove any remaining residue.
Handling Grease Explosions
When fatty foods explode, they coat everything in a fine mist of grease that’s invisible when wet but becomes that sticky, yellowish film when it dries. Standard steam cleaning helps, but for major grease catastrophes, you need extra power.
Mix equal parts white vinegar and water in a spray bottle, add a squirt of dish soap (which is specifically designed to cut grease), and spray liberally on all surfaces. Let it sit for five minutes, then wipe with a warm, damp cloth. The combination of acid, detergent, and time breaks down the grease molecular bonds, making it wipe away easily.
For the ceiling, which bears the brunt of grease explosions, you might need to spray and wipe multiple times, working in sections to ensure you remove all residue.
Maintenance Strategies to Keep Your Microwave Clean
The best cleaning strategy is preventing messes in the first place. An ounce of prevention really is worth a pound of cure.
Daily Habits That Prevent Buildup
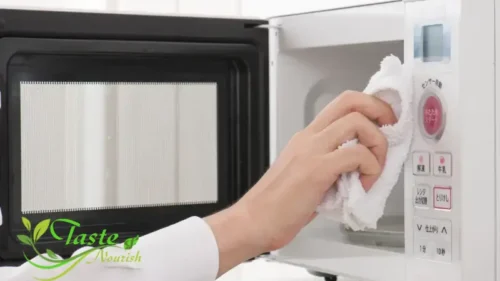
Make it a rule: wipe down your microwave after each use. Keep a designated microfiber cloth near your microwave and simply wipe the interior and door while they’re still warm and any splatters are fresh. This 15-second habit prevents the hardened, stuck-on messes that require serious cleaning efforts later.
Use microwave-safe covers when heating food. A simple microwave cover, or even a paper towel placed over your dish, catches splatters before they reach the interior surfaces. This single habit can reduce your deep-cleaning frequency dramatically.
When reheating soups, sauces, or other liquids prone to explosive bubbling, use a lower power setting and heat in shorter intervals, stirring in between. This prevents the volcanic eruptions that coat your microwave ceiling in sauce.
Weekly Maintenance Routine
Even with daily wipe-downs, a weekly steam cleaning session keeps your microwave in pristine condition. It only takes five minutes—fill a bowl with water and lemon juice, run it for three minutes, let it sit for three minutes, then wipe down the interior.
This weekly habit prevents the accumulation of odors and ensures any spots you might have missed during daily cleaning get addressed before they become problems. Think of it like brushing your teeth daily and visiting the dentist regularly—the combination keeps problems from developing.
Common Microwave Cleaning Mistakes to Avoid
Even with the best intentions, it’s easy to make mistakes that damage your microwave or make cleaning harder.
Products That Can Damage Your Microwave
- Never use oven cleaner inside your microwave. Oven cleaners are designed for the high-heat, different surfaces of conventional ovens and contain caustic chemicals that can damage microwave interiors, leaving toxic residues that could transfer to food.
- Avoid ammonia-based cleaners, which can damage plastic components and leave harmful residues. Bleach is another no-go—it’s too harsh for microwave surfaces and creates dangerous fumes in enclosed spaces.
- Abrasive cleaners and scouring pads scratch the interior coating, creating rough spots that collect dirt more easily and potentially compromising the protective layer that prevents rust.
Cleaning Techniques That Do More Harm Than Good
- Never run your microwave empty—not even “just to heat it up” before cleaning. Microwaves need something to absorb the energy; running empty can damage the magnetron (the component that generates microwaves) and create hot spots that can cause fires.
- Don’t use excessive water when wiping down the control panel or vents. Moisture seeping into electronics or ventilation systems can cause malfunctions and create mold growth in areas you can’t easily clean.
- Avoid using paper products with printed designs or recycled materials inside your microwave during steam cleaning. The inks and chemicals in these papers can transfer to your microwave’s interior surfaces or release harmful compounds when heated.
How Often Should You Really Clean Your Microwave?
There’s no one-size-fits-all answer, but here are guidelines based on usage patterns.
Usage-Based Cleaning Schedules
If you use your microwave daily for multiple meals, you should do a quick wipe-down after each use, a thorough steam cleaning weekly, and a deep clean monthly. This frequency prevents buildup and keeps your microwave hygienically safe.
For moderate users (a few times per week), a thorough cleaning every two weeks with spot-cleaning as needed usually suffices. Light users who only occasionally reheat beverages or leftovers can probably get away with monthly cleaning.
However, these are just starting points. Adjust based on what you’re heating. If you frequently cook messy foods like spaghetti sauce or bacon, you’ll need to clean more often regardless of frequency.
Signs Your Microwave Needs Immediate Attention
- Visible food splatters or stains are obvious indicators, but don’t ignore subtler signs. If you notice odors when you open the microwave door (even when it’s empty), that’s bacteria or food particles breaking down—time to clean immediately.
- If your microwave seems to take longer to heat food than it used to, buildup on interior surfaces might be absorbing microwave energy. A thorough cleaning often restores normal heating times.
- Discoloration of interior surfaces—yellowing, browning, or dark spots—indicates grease and food residue that’s been there long enough to essentially stain the surface. These spots need attention before they become permanent.
Environmental and Health Considerations
Cleaning isn’t just about appearance—it’s about creating a healthy home environment.
Eco-Friendly Cleaning Alternatives
The natural cleaning methods we’ve discussed—vinegar, lemon, baking soda—are inherently eco-friendly. They’re biodegradable, non-toxic, and don’t contribute to water pollution or harmful chemical buildup in your home.
Consider the broader environmental impact of your cleaning habits too. Using reusable microfiber cloths instead of paper towels reduces waste. Making your own cleaning solutions in reusable spray bottles eliminates plastic packaging from commercial cleaners.
Even your water usage matters. The steam method uses minimal water compared to repeated rinse-and-wipe cycles with disposable cleaning wipes.
Reducing Chemical Exposure in Your Kitchen
Your microwave heats food—anything you use to clean it could potentially transfer to your meals. Natural cleaners eliminate the risk of chemical residue on food-contact surfaces.
Many commercial cleaning products release volatile organic compounds (VOCs) that contribute to indoor air pollution. Over time, exposure to these compounds can cause respiratory irritation, headaches, and other health issues. Natural cleaning methods avoid these concerns entirely.
For families with children, elderly members, or anyone with chemical sensitivities or compromised immune systems, natural cleaning methods provide effective hygiene without health risks.
Troubleshooting: When Cleaning Isn’t Enough
Sometimes, problems that seem like cleaning issues are actually signs of mechanical problems.
Identifying Microwave Problems Beyond Cleanliness
- If persistent odors remain even after thorough cleaning and deodorizing, you might have food particles trapped in the ventilation system or behind interior panels—areas you can’t easily access. This requires professional service.
- If you notice sparks when running your microwave (even after removing all metal objects), the interior coating might be damaged, exposing metal underneath. This is a safety hazard that requires professional repair or replacement.
- Uneven heating that persists after cleaning could indicate a failing magnetron or damaged waveguide cover. These aren’t cleaning issues—they’re mechanical problems requiring professional diagnosis.
When to Call a Professional
- If your microwave’s door doesn’t close properly or the seal appears damaged, don’t try to fix it yourself. A compromised seal allows microwave radiation to leak—a serious safety hazard. Professional repair or replacement is necessary.
- Any electrical issues—sparking, burning smells, or failure to start—require professional attention. Never attempt to repair the electrical components of a microwave yourself; the capacitors store dangerous amounts of electricity even when unplugged.
- If cleaning reveals rust, especially around the door seal or interior cavity, consult a professional about whether repair is worthwhile or if replacement is more cost-effective and safer.
Conclusion
Cleaning your microwave doesn’t have to be the dreaded chore you’ve been putting off for weeks. With the right techniques—especially the simple but powerful steam method—you can transform even the grimiest microwave into a sparkling appliance in less than 15 minutes. The key is understanding the science behind why microwaves get dirty and using that knowledge to work smarter, not harder.
Remember, regular maintenance prevents the deep-cleaning disasters that make you consider just buying a new microwave altogether. A quick daily wipe-down and weekly steam session keep your microwave hygienically safe, energy-efficient, and looking good for years to come.
Natural cleaning methods using vinegar, lemon, and baking soda aren’t just budget-friendly and eco-conscious—they’re scientifically proven to be effective against the bacteria, grease, and grime that accumulate in microwaves. You don’t need harsh chemicals or expensive products to achieve professional-level cleanliness.
Your microwave is one of your kitchen’s hardest-working appliances. Treat it right with regular cleaning, and it’ll continue serving you reliably for years. Plus, there’s something genuinely satisfying about opening a sparkling clean microwave door instead of averting your eyes from last week’s burrito explosion.
FAQs
1. Can I use bleach to clean my microwave?
No, you should avoid using bleach inside your microwave. Bleach is too harsh for the interior surfaces and can leave toxic residues that might transfer to your food. It can also damage plastic components and create dangerous fumes in the enclosed space. Stick with natural cleaners like vinegar, lemon, and baking soda, which are effective, safe, and don’t leave harmful residues.
2. How do I clean the area behind the microwave vent?
The area behind or above the vent is difficult to access but collects grease and dust. First, consult your owner’s manual to see if the vent cover is removable. If it is, remove it and wash it in warm, soapy water. For the area behind the vent, use a vacuum with a brush attachment to remove dust and debris, then wipe accessible areas with a cloth dampened with soapy water. For built-up grease, a degreasing dish soap solution works well.
3. Is it safe to use my microwave if the interior coating is peeling?
This depends on the extent of the damage. Minor peeling of the interior paint is generally safe, though you should avoid further damage by not using abrasive cleaners. However, if the peeling exposes the metal underneath, this creates a risk of sparking and should be addressed. Small exposed areas can sometimes be repaired with microwave-safe paint available from appliance stores, but extensive damage usually means it’s time for a replacement.
4. Can I put the turntable and roller ring in the dishwasher?
Most glass turntables and plastic roller rings are dishwasher-safe, but check your owner’s manual to be certain. Place the turntable on the bottom rack where it has plenty of space and won’t interfere with the spray arms. The roller ring can go on the top rack. If you notice any warping or damage after dishwashing, hand-wash these components going forward, as heat damage can affect their fit and function.
5. Why does my microwave still smell bad even after I’ve cleaned it thoroughly?
Persistent odors usually indicate one of three things: food particles trapped in areas you can’t easily reach (like ventilation systems or behind removable panels), bacterial growth in the door seal grooves, or odors that have penetrated the porous interior coating. Try the overnight baking soda or activated charcoal absorption method. If the smell persists, the odor may have permanently penetrated the interior materials, especially if strong-smelling foods (like fish) were repeatedly heated over time. In extreme cases, the interior coating might need professional replacement.
Scientific Sources:
- Rosenberg, E., et al. (2013). “The role of microorganisms in formation and degradation of food residues in microwave ovens.” Applied and Environmental Microbiology Journal. https://journals.asm.org/journal/aem
- Srey, S., Jahid, I.K., & Ha, S.D. (2013). “Biofilm formation in food industries: A food safety concern.” Food Control Journal, 31(2), 572-585. https://www.sciencedirect.com/journal/food-control